Gardening My Way!
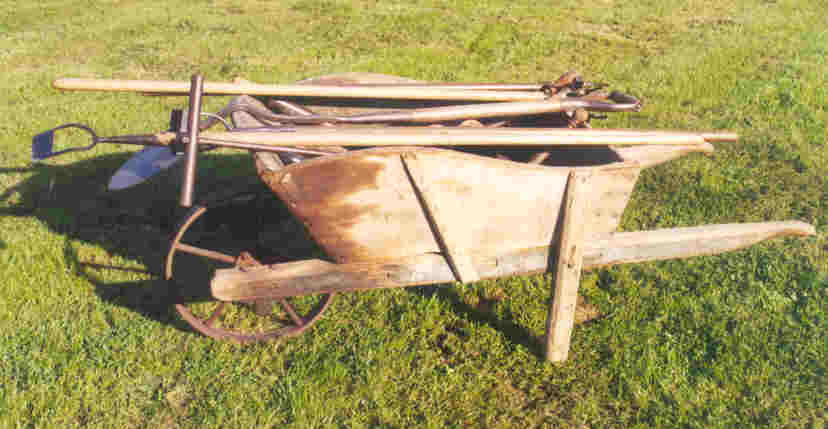
I can't help to think of the time with the wheel barrow below that the Germans were going through a terrible depression and their money was worth less every day. People when shopping used to fill up a wheel barrow with the worthless currency and bring a basketful of it into the bakery to buy a loaf of bread. The story continues when one fellow walked into the bakery and when he came out he found all of the money dumped on the street, and the wheel barrow was gone. So the moral of the story is, you can always get something to eat if you have a wheel barrow, if it is to either to grow a crop or to carry worthless money, but keep a chain on the wheel barrow.
Gardening is such a large topic we are not even going to attempt to cover most of the various cultures. We do have a few techniques that we use in our gardening operations, mostly borrowed from our 35 year agrarian past. Before we get into actual hands on details we want to introduce you to a concept of gardening that we favor. Now whether you favor it or not is up to you, as gardens can take on thousands of shapes, sizes, varieties, colors, configuration etc. and the most attractive is all in the eyes of the beholder.
Something Special
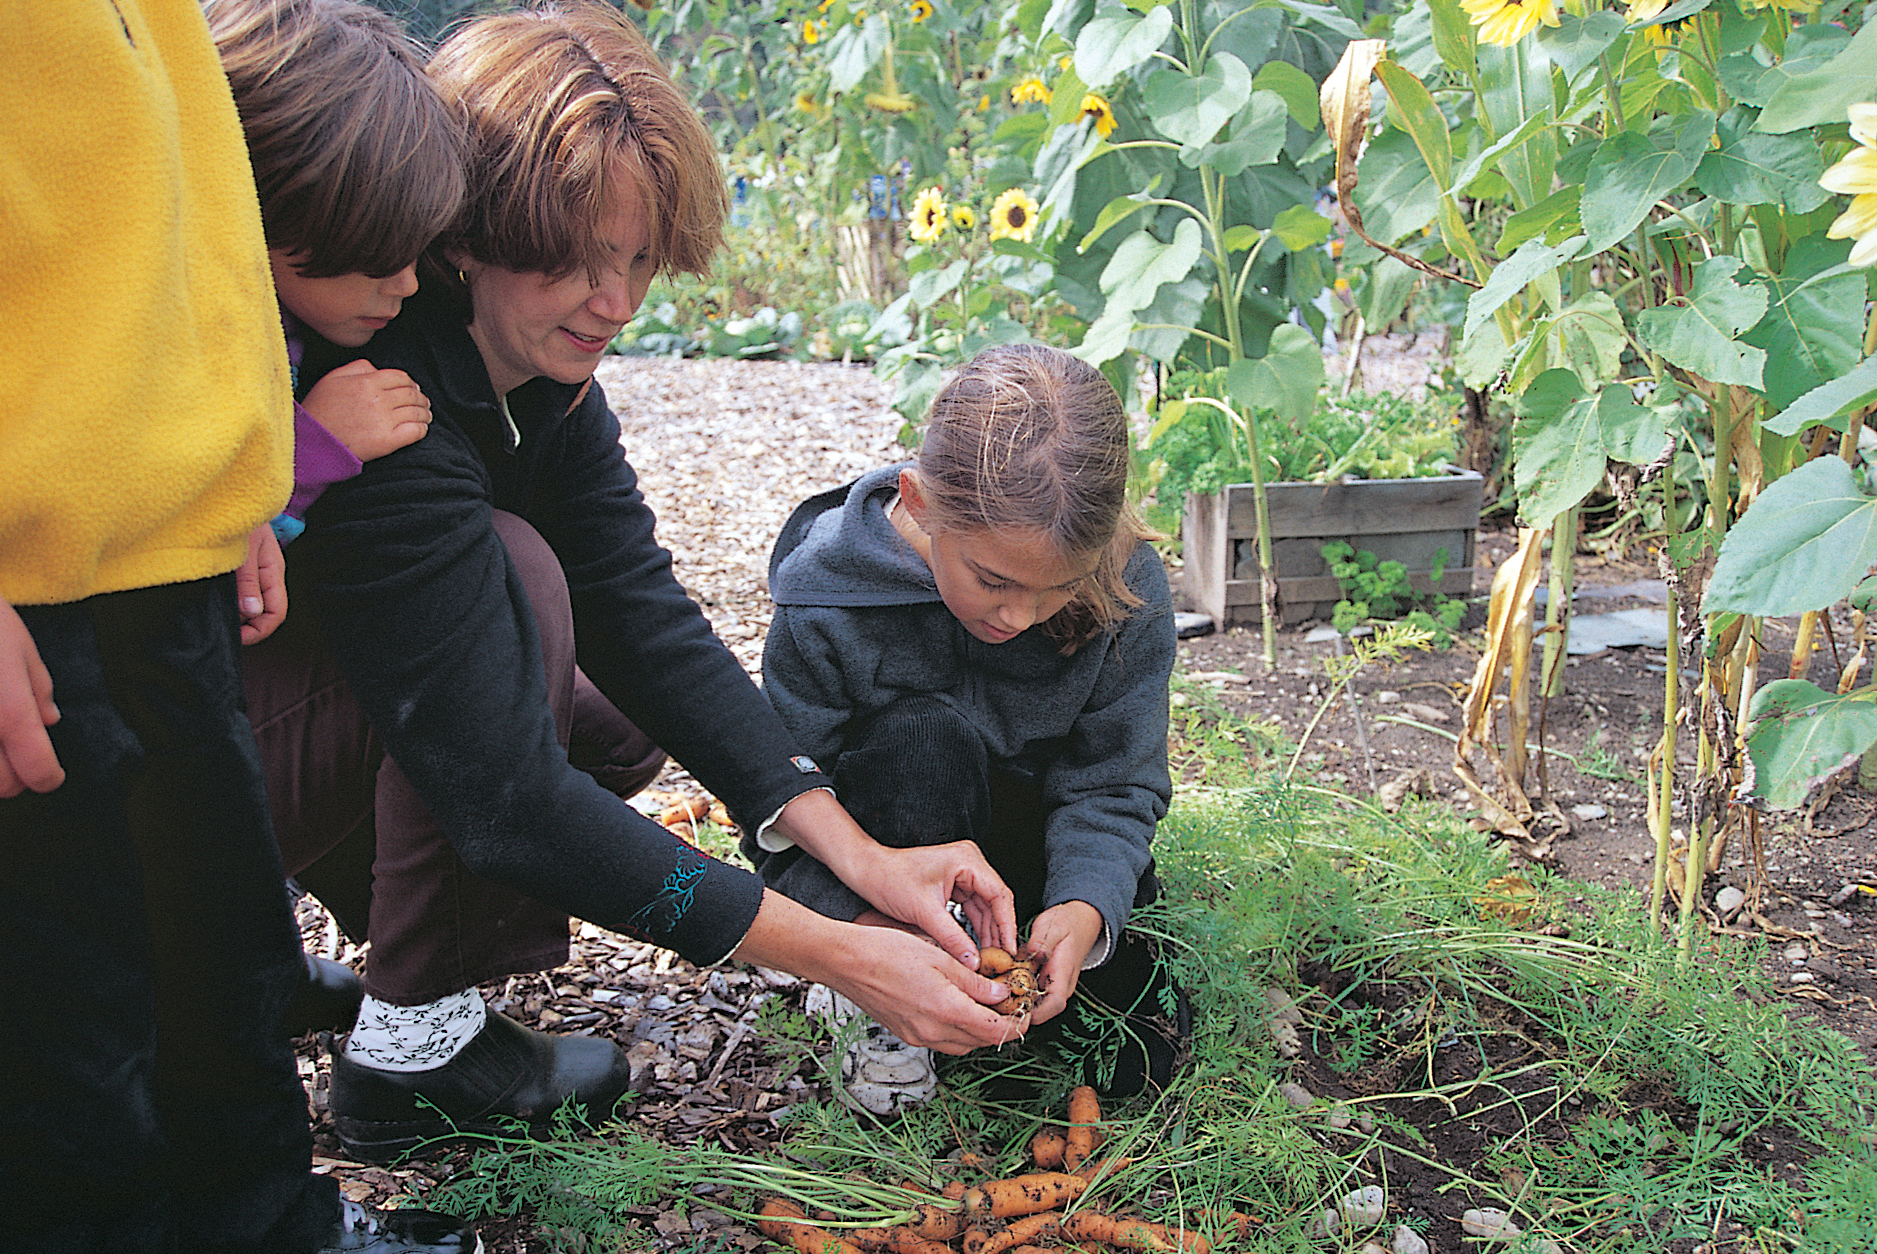
There is something very special we feel concerning this feature over and above the love of gardening, with all its benefits beauty and exercise to name just two. We had in our roadside market and farm business the privilege in working with some very special children. We cherry picked the high performers out of our Strawberry pickers. We called them our super stars by bringing them in to our various operations. We trained this elite group over the years and many if not all went on to huge achievements in their lives. Of course college etc. required a constant turnover, but with our large strawberry fields we always could find enough help and good help they were. Actually this method of obtaining good help was given to us by an old horse trader and you can read about him and others in our lives in our feature http://blueeyedcurse.com/twistfate.htm This select group included our children and other family members. There is a saying that I borrowed with the image above "When Kids Garden Kids Grow"
Now you will soon see as you start this feature that we practice a very economical approach to our gardening by way of recovering bulbs and taking cuttings from our plants. Of course you have the culture of planting seeds. We used to save seeds from the largest tomatoes and planted them the following year. This was before hybriding that makes it difficult to propagate seed.
Now if you were to bring your children or for that matter your Grandchildren into this fascinating world of "Self preservation" it wouldn't take you very long to see how excited they become when they participate in the culture of gardening. They eat it up alive and it will stick to their ribs for the rest of their lives.
In addition teaching children the frugality of saving generations from one year to the other and doing it with Mother nature is one of the most important things that you can instill in them and again their reaction to seeing seeds pop through the ground, taking a cutting putting it in water and seeing roots form in a short time and last digging up bulbs, pigeon holing them away for a few months and planting them in the spring is not only a joy for them, it will be a joy for you. Knowing that you did pass on to them the proverbial "How to fish" and in the process teaching them how to feed themselves for a lifetime. Speaking of fishing, fishing is another great means to incorporate a conservative mentality in a child.
 We have left out growing fruits and
vegetables in this feature as we have confined this feature to beautiful
plants and flowers, but by all means include things the kids will eat out of the
garden, as that will produce a great deal more meaning in the total
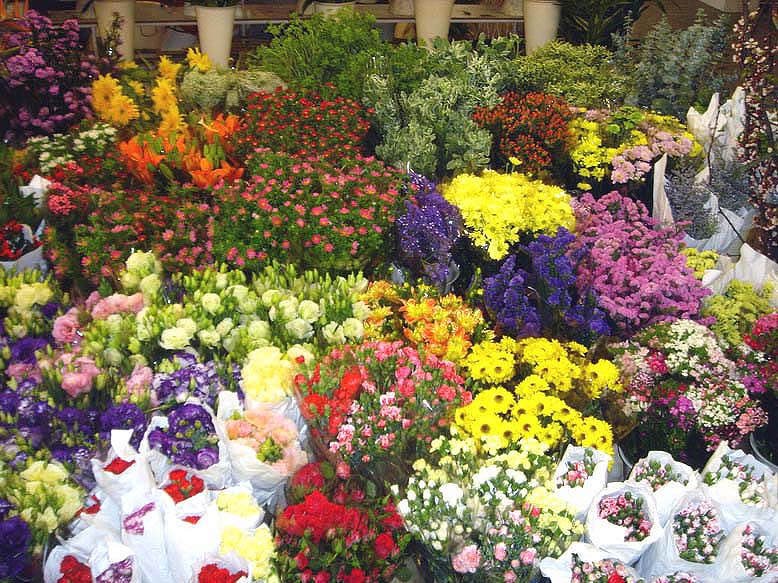
effort. Just leave enough garden space for Mom to grab a bouquet of
something beautiful to bring into the house on a regular basis.
We have left out growing fruits and
vegetables in this feature as we have confined this feature to beautiful
plants and flowers, but by all means include things the kids will eat out of the
garden, as that will produce a great deal more meaning in the total
effort. Just leave enough garden space for Mom to grab a bouquet of
something beautiful to bring into the house on a regular basis.
So lets get started with "Gardening my way"
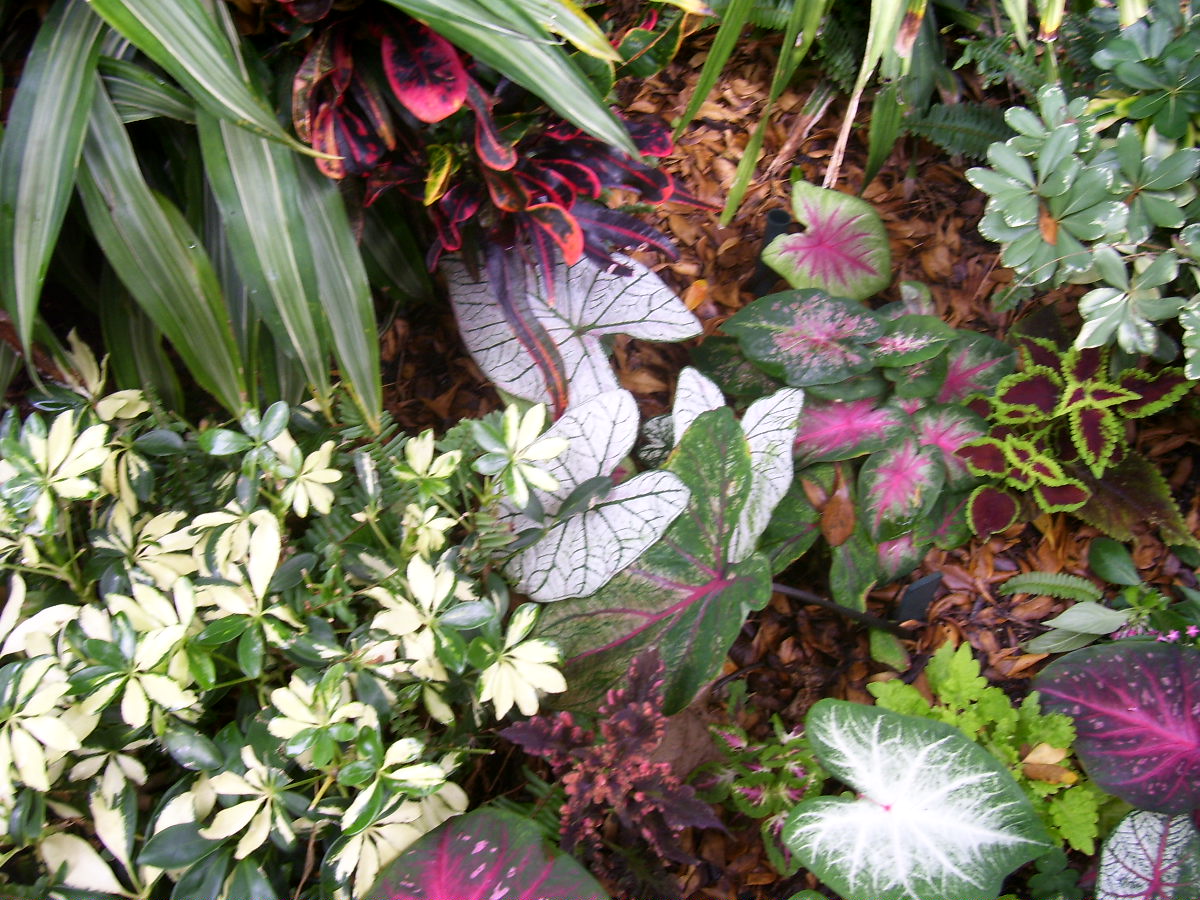
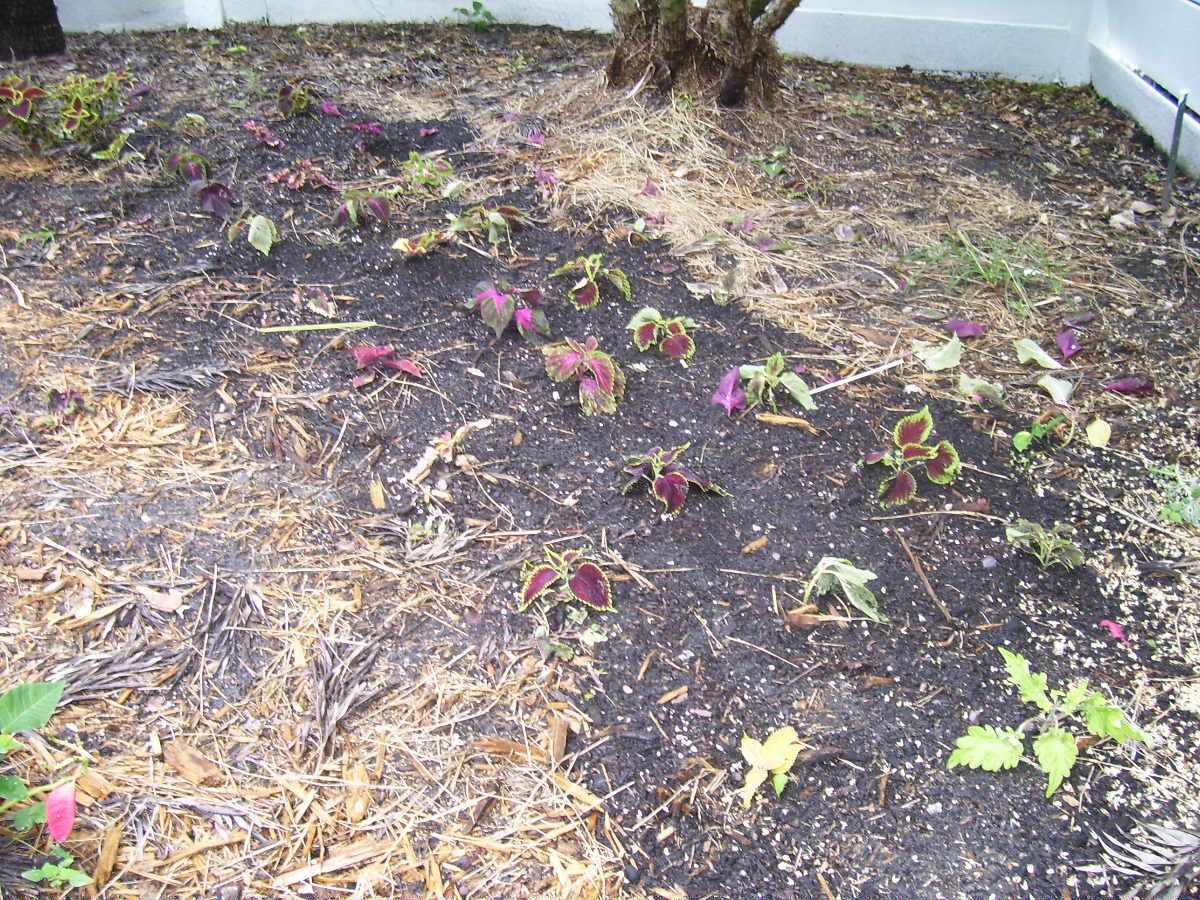
 There is a group of images below that
will give you some idea as to our concept. We use a great deal of the
Coleus variety with their variegated colors that actually remind us of our
Northeast past and the change of colors in the fall. We don't believe
there is anything more beautiful than the fall change of colors and the Coleus
plants have many similarities. In our case we bring them to Florida and
Texas where we and our families reside now. You will learn one of the best
features of the Coleus is that it is easy to propagate by taking cuttings from
them.
There is a group of images below that
will give you some idea as to our concept. We use a great deal of the
Coleus variety with their variegated colors that actually remind us of our
Northeast past and the change of colors in the fall. We don't believe
there is anything more beautiful than the fall change of colors and the Coleus
plants have many similarities. In our case we bring them to Florida and
Texas where we and our families reside now. You will learn one of the best
features of the Coleus is that it is easy to propagate by taking cuttings from
them.
They take the heat quite well, but we noticed that they are quite tender with cold spells as they are a succulent of sorts. We keep 3 big garbage cans full of coastal hay that we buy here in South Florida. If it gets cold we apply it on the plants and coastal hay clings very well in the wind. When it warms up we put it back in the cans. There is always some that get on the ground so we leave it for mulch.
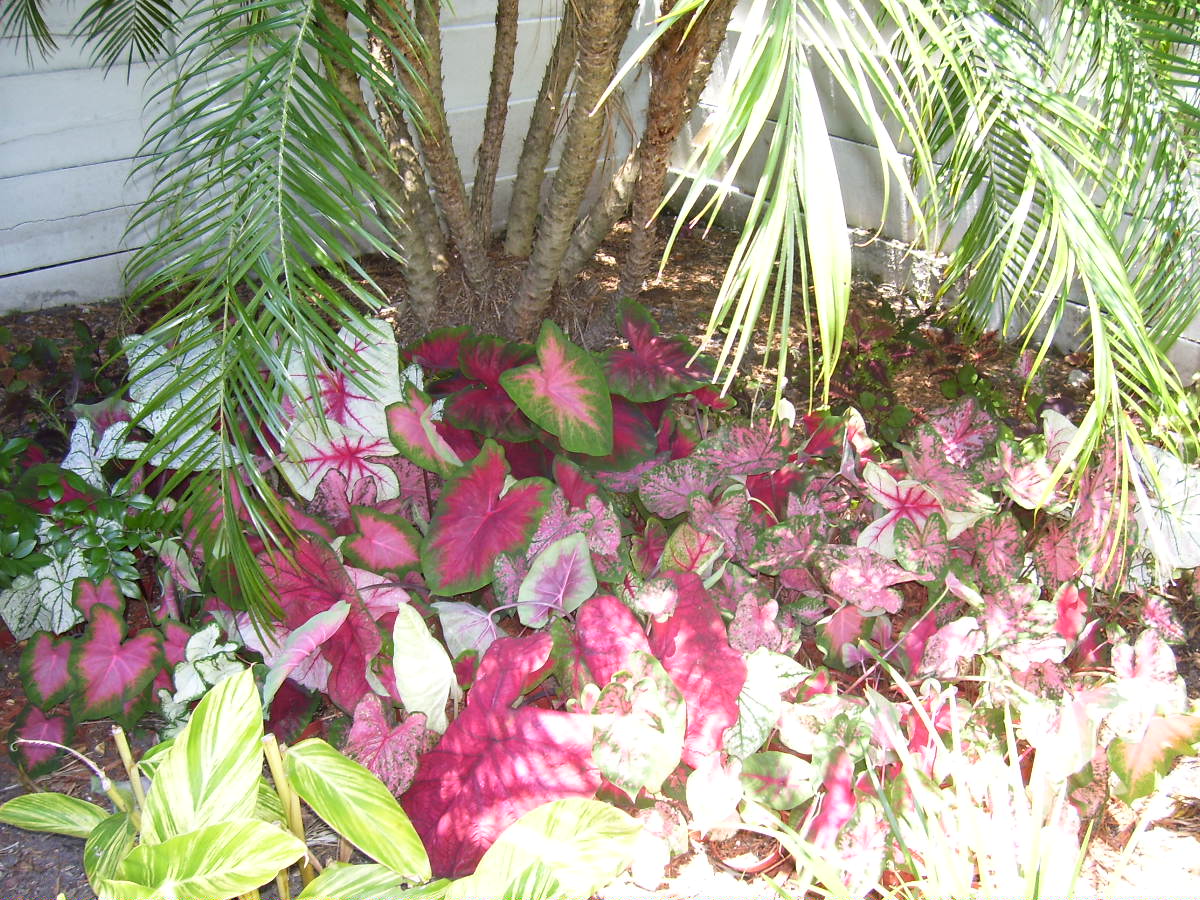
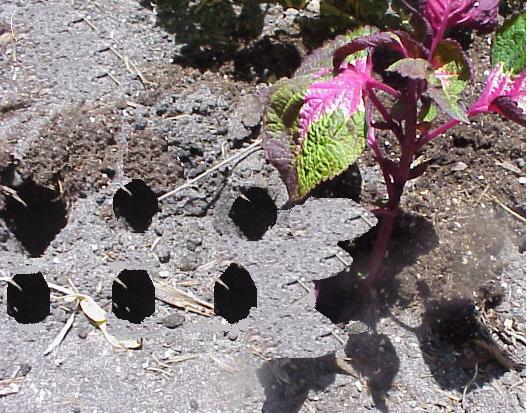
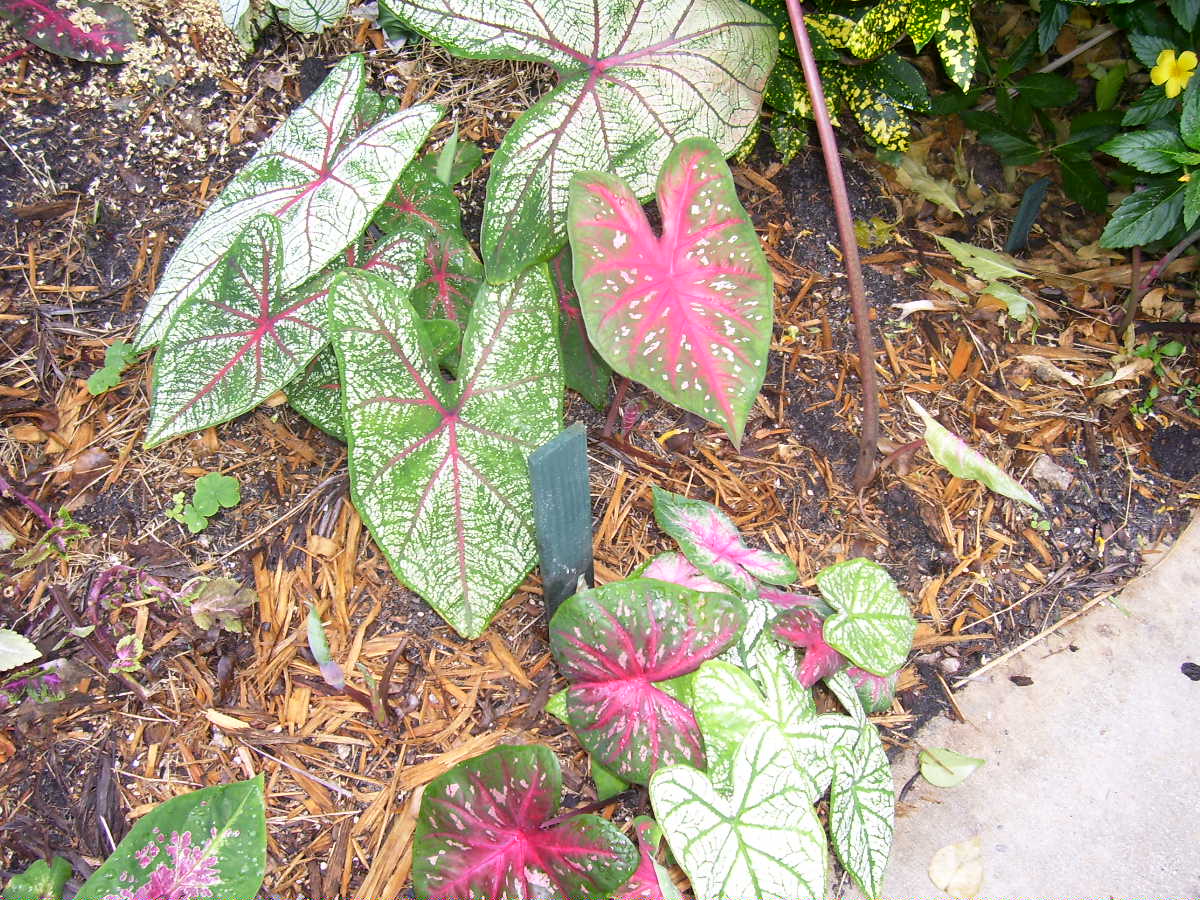
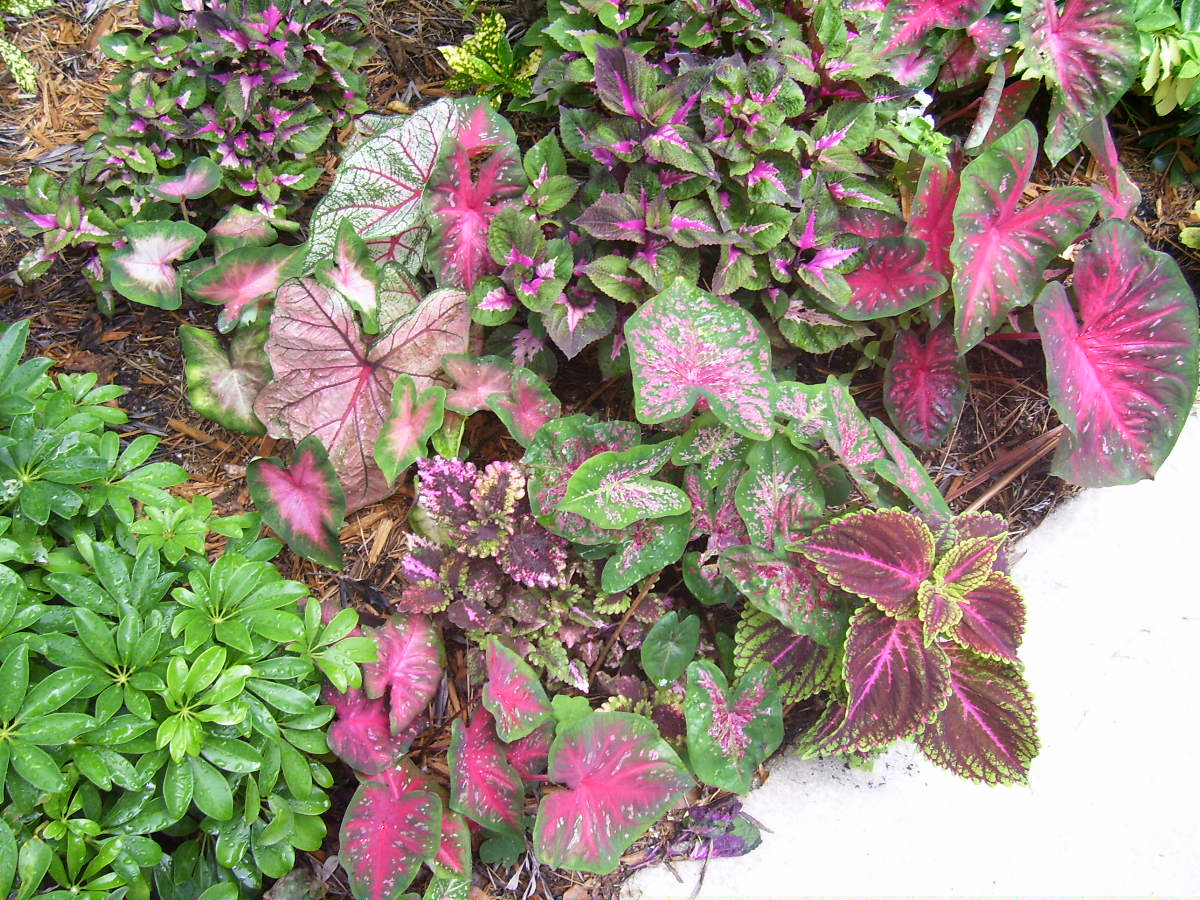 There is also another leaf variety
we use and the picture on the lower left shows the big leaf Caladiums
intermingled with Coleus. Another
nice economic feature of the caladium is that they produce baby bulbs that can
be retrieved in the fall, stored and planted the next season.
There is also another leaf variety
we use and the picture on the lower left shows the big leaf Caladiums
intermingled with Coleus. Another
nice economic feature of the caladium is that they produce baby bulbs that can
be retrieved in the fall, stored and planted the next season.
Note: If you live in a tropical area you can leave the bulbs and just let me decline in the fall and they will pop up to some degree in the spring. In fact in the case of a mild late fall they will continue to make leaves.
Again they blend nicely with Coleus.
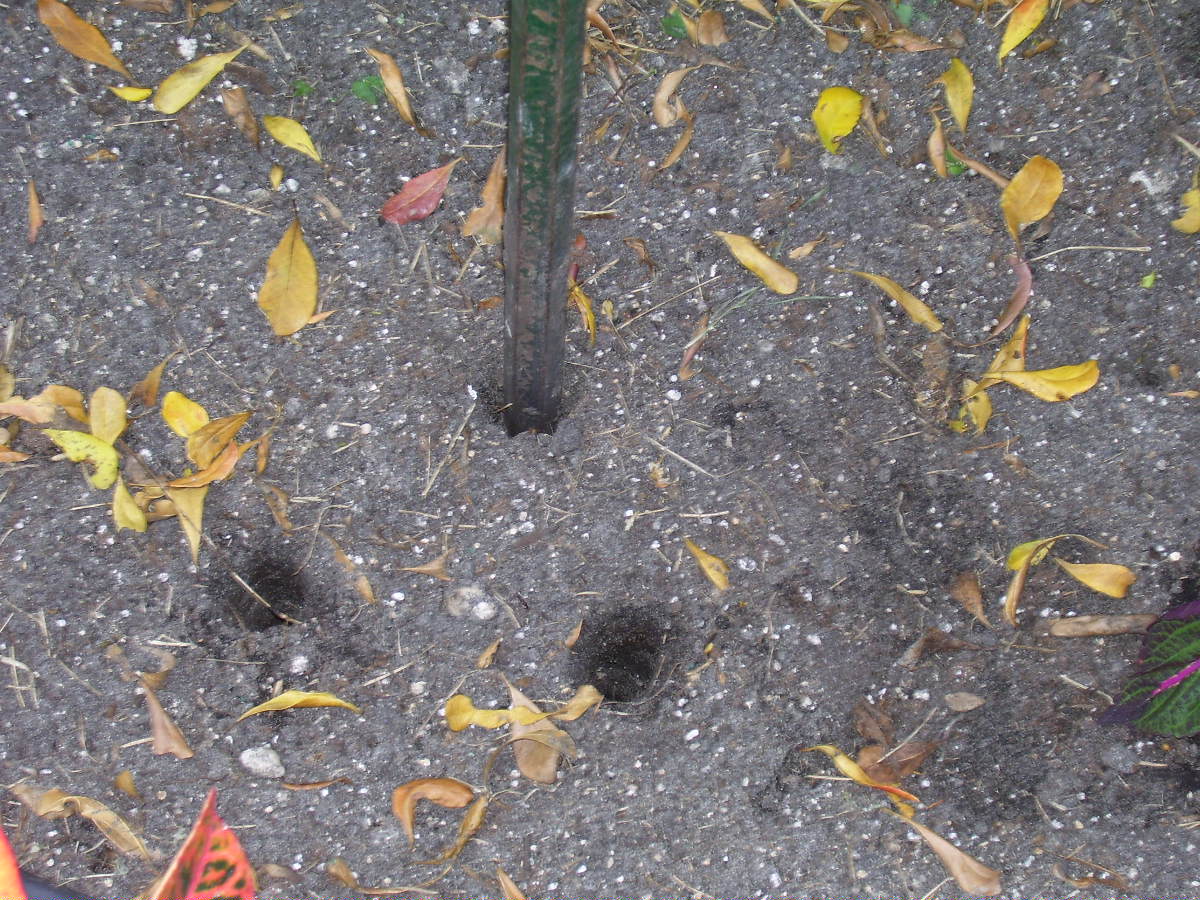
 We buy about a hundred jumbo
first generation Caladium bulbs every year. We plant the bulbs about the first
of March. They start to pop their heads up in a few weeks. Now we
stake these areas when we plant them, because when fall comes around some of
these plants have declined and you really do not know where they are located or
the hidden treasure underneath the ground,
We buy about a hundred jumbo
first generation Caladium bulbs every year. We plant the bulbs about the first
of March. They start to pop their heads up in a few weeks. Now we
stake these areas when we plant them, because when fall comes around some of
these plants have declined and you really do not know where they are located or
the hidden treasure underneath the ground,
 the sons and daughters, the
new crop of bulbs.. You talk about fun. Have the kids uncover these
bulbs. It will be just like an Easter egg hunt. Then in a few months
let them plant them and wait until they pop their heads. If you don't
think that is going have an influence on their lives, you are mistaken.
the sons and daughters, the
new crop of bulbs.. You talk about fun. Have the kids uncover these
bulbs. It will be just like an Easter egg hunt. Then in a few months
let them plant them and wait until they pop their heads. If you don't
think that is going have an influence on their lives, you are mistaken.
 Now you can take either
plastic
pipes or pressure treated slats to mark their location.
So in the fall all you have to do is dig down, knock the dirt off of the bulbs,
dry them for a few days and store them into a cool closet for about 4 months or
so. Jumbo first generation bulbs produce some nice sized sons and
daughters and they do quite well the next planting season.
Now you can take either
plastic
pipes or pressure treated slats to mark their location.
So in the fall all you have to do is dig down, knock the dirt off of the bulbs,
dry them for a few days and store them into a cool closet for about 4 months or
so. Jumbo first generation bulbs produce some nice sized sons and
daughters and they do quite well the next planting season.
 The picture to the left are second
generation Caladium bulbs that we had saved from the year before as described
above. We planted them in open bottom pots (Picture below on the right) in
a protected area around the middle of January. This open bottom allows the
roots to exit and not get root bound on the sides. We actually bury the
pots at ground level over a bed of nice top soil. This gives us a head
start in the spring for our summer gardens as Caladiums tolerate the heat of the
summer quite well. They won't pop up for at least 3 weeks. We cover them
lightly with a coastal hay here in South Florida. When they do pop
up and there is a cold snap like the first part of February, we throw a
little more hay on them for added protection. Of course the hay acts as a
mulch.
The picture to the left are second
generation Caladium bulbs that we had saved from the year before as described
above. We planted them in open bottom pots (Picture below on the right) in
a protected area around the middle of January. This open bottom allows the
roots to exit and not get root bound on the sides. We actually bury the
pots at ground level over a bed of nice top soil. This gives us a head
start in the spring for our summer gardens as Caladiums tolerate the heat of the
summer quite well. They won't pop up for at least 3 weeks. We cover them
lightly with a coastal hay here in South Florida. When they do pop
up and there is a cold snap like the first part of February, we throw a
little more hay on them for added protection. Of course the hay acts as a
mulch.
 The wonderful aspects of
Coleus and
Caladiums is they are easy to propagate with the Caladium tubers/bulbs and the
cuttings we use from the Coleus. Most of our feature here will cover how
we saturate our entire property with tubers/bulbs and cuttings for free and a
little healthy gardening. We do sprinkle a few annuals here and there for
color, the Salvias, Impatients, Pentas, Marigolds etc. We even
plant about 30 beautiful Poinsettias randomly and they last from November
to the spring.
The wonderful aspects of
Coleus and
Caladiums is they are easy to propagate with the Caladium tubers/bulbs and the
cuttings we use from the Coleus. Most of our feature here will cover how
we saturate our entire property with tubers/bulbs and cuttings for free and a
little healthy gardening. We do sprinkle a few annuals here and there for
color, the Salvias, Impatients, Pentas, Marigolds etc. We even
plant about 30 beautiful Poinsettias randomly and they last from November
to the spring.
There is a nice Internet source that we have discovered for Caladium bulbs. Link is below........ http://www.caladiumbulbs.com/information.htm order their catalog during the winter and get your order in.
Below a link to the foremost expert on Caladium. He answers a host of questions on the growing culture of caladiums.
http://www.happinessfarms.com/askthedoc.html
To repeat obtain your bulbs as early as they will ship them to you for your particular area of the country and even before. You can hold bulbs in the garage for a few weeks and be ready to plant them. Remember if you do plant them early and they pop their heads a little hay or straw will protect them.
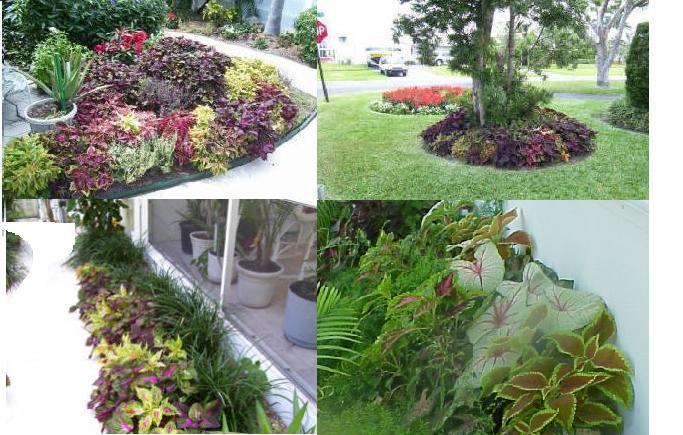
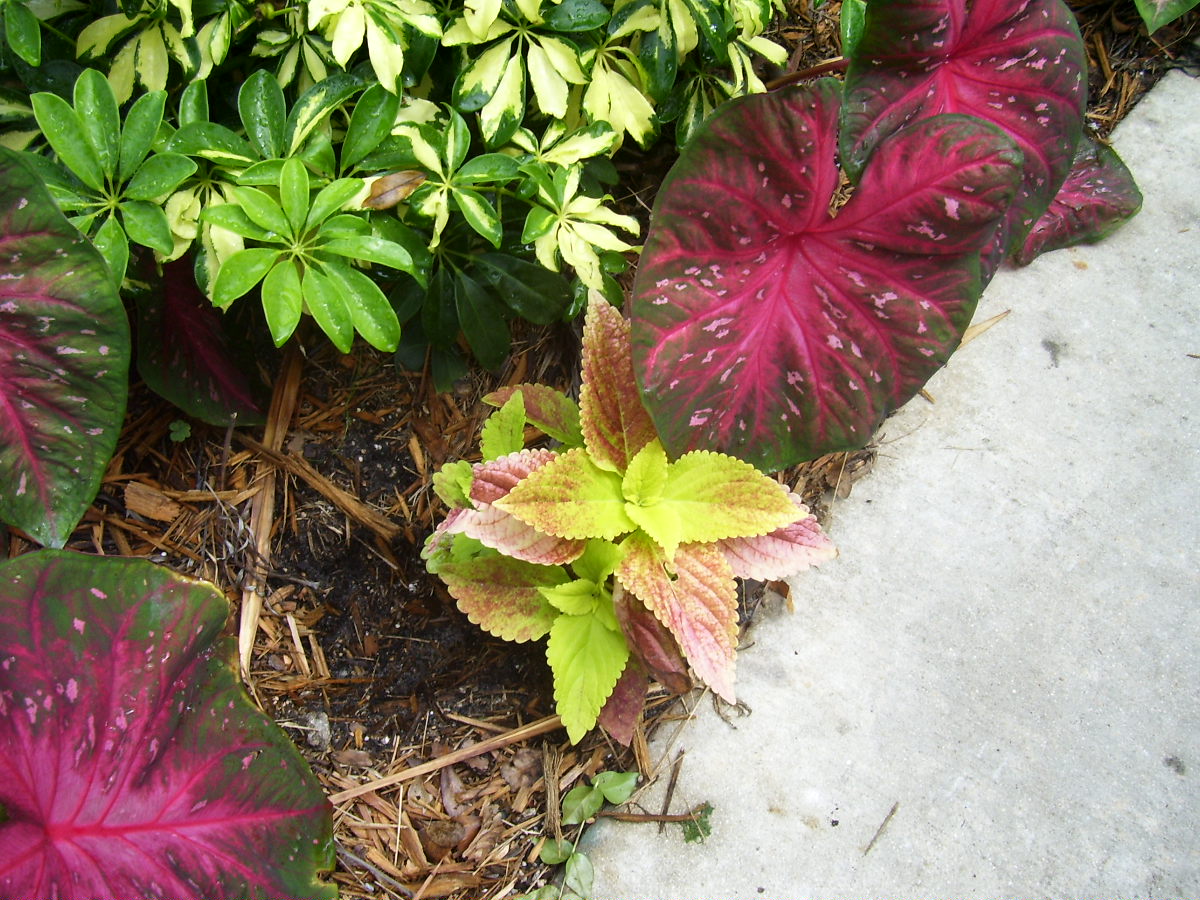
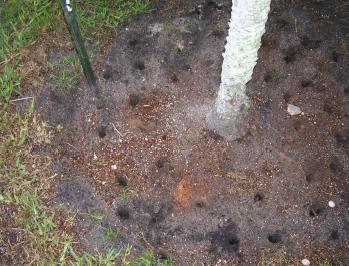
If you look closely above at the coleus under the tree in the upper right hand corner you will see that they are short. Coleus like to be hedged. Of course if you need cuttings you should take the desirable young shoots before you do the hedging. Actually the hedging encourages new growth and cutting material.
You have a little hole somewhere, just grab a cutting from anywhere and stick it in the ground. It might grow!
We will show you below how we "Stick em in the ground".
The Tools
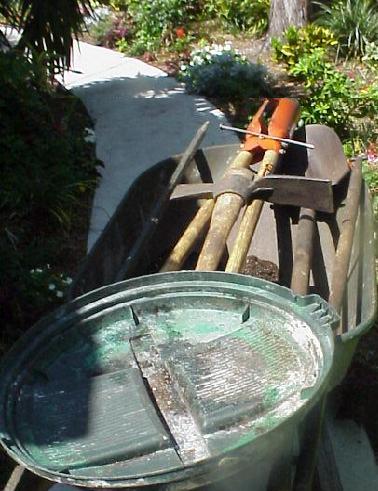 The
wheel barrow to the left holds most of the tools we use for our gardening
chores. Some of them may look a little strange to you. The garbage
can cover for instance happens to be one of the best means to transport just
about anything around the garden , cuttings, potting soil, trash, mulch, weeds,
small tools. We even put a little water in it and use it to apply starter
powder to the cutting buds that have to be wet. There are times we have
two of these covers in action at the same time. We just borrow them from
the garbage cans we have kicking around.
The
wheel barrow to the left holds most of the tools we use for our gardening
chores. Some of them may look a little strange to you. The garbage
can cover for instance happens to be one of the best means to transport just
about anything around the garden , cuttings, potting soil, trash, mulch, weeds,
small tools. We even put a little water in it and use it to apply starter
powder to the cutting buds that have to be wet. There are times we have
two of these covers in action at the same time. We just borrow them from
the garbage cans we have kicking around.
From left to right a large pointed bar, a post hole digger, on top of that is a railroad spike and on top of the handles a heavy duty axe and pick that comes in handy when you want to deepen a bed and can't get a shovel down too easy. The pointed bar works good to for depth. Most gardens have a hard pan under them and this is a tragedy. Loosen the top soil and get into that hard pan with the pick. Just take a day off from the gym.
One of the biggest tragedies of gardening has been the advent of the roto tiller. Roto tillers are fine if you can obtain a deep turn over of the soil of at least 8 inches first. There are few roto tillers that can get down that deep. 3, 4 or even 5 inches deep develops a hard pan that is not conducive to capillary action. Capillary action is a study in itself but critical to good gardening.
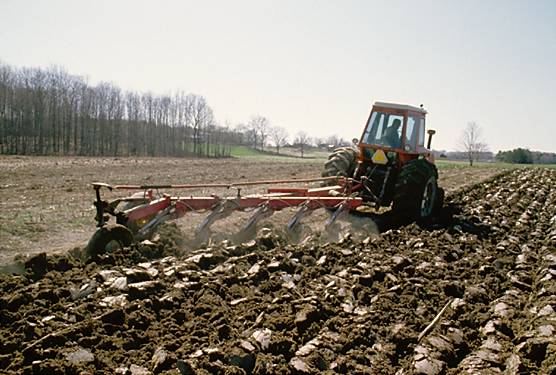 We have the
traditional shovel next, (A shovel is the best way to turn over a garden by the
way, full depth of the shovel and break up the clumps as you go.) To give
you a good example how important it is to turn the ground over deep, we had a 4
bottom plow on our farm with a huge tractor to pull it. We could get down to about an
8 inch depth or a little more. Every third year we took 2 of the 4 plows
off to gain more power and depth and using the same tractor we could obtain close to
12 inches in depth. In fact we always tried to bring up what they refer to as
a little subsoil when we plowed which is under the top soil.
We have the
traditional shovel next, (A shovel is the best way to turn over a garden by the
way, full depth of the shovel and break up the clumps as you go.) To give
you a good example how important it is to turn the ground over deep, we had a 4
bottom plow on our farm with a huge tractor to pull it. We could get down to about an
8 inch depth or a little more. Every third year we took 2 of the 4 plows
off to gain more power and depth and using the same tractor we could obtain close to
12 inches in depth. In fact we always tried to bring up what they refer to as
a little subsoil when we plowed which is under the top soil.
Leaving clumps in a garden even for a short time is a mistake. They call it the "concrete effect". It dries and cakes and that's not good. Break up the soil as you go with the shovel and as soon as you complete the "plow down" take a fork and break up the clumps into a loose composition. This is the time to use a roto tiller if you have one.
 At
the right is what we refer to as the antique cultivating tool that we have
written a whole feature on. We found an original prototype of this
tool in a 200 year old barn and we were so impressed with it (after we figured
it out) we duplicated it 5 times for a crew of men that cultivated our 30
acres of strawberry plants. It is a two sided tool with 2 prongs on one
end and a large spike on the other. It works like a charm for general
cultivation with the prongs for larger areas between the plants, but also flips around for very
delicate work around the base of a plant with the nail end. You have to be a little careful
with a nail
sticking out of one end as it can be dangerous not only to the plants but to you
and anyone within spear length. When you construct this
tool, you actually drill a hole in the opposite end of the fork and with the end being oak in most cases, you need a pilot
hole and use a long screw. So actually the head of the screw will be on
the end. You don't have to grind it to a point. By doing this you
reduce the chances of hurting yourself. Hoes and deep cultivation are the serial killers of
gardening. When plants become established and you use mulch, just going
out in the bed and gently loosening the mulch a little is all you need with the
spike end. It will keep the mulch on the top of the ground instead of
burying it. Not a bad idea using the spike end in your larger potted plants. They like a little oxygen too. You will be intrigued with this
tool. We show you
how to create it and we show you how to use it. The link is
http://www.blueeyedcurse.com/aloeplanttool.htm
At
the right is what we refer to as the antique cultivating tool that we have
written a whole feature on. We found an original prototype of this
tool in a 200 year old barn and we were so impressed with it (after we figured
it out) we duplicated it 5 times for a crew of men that cultivated our 30
acres of strawberry plants. It is a two sided tool with 2 prongs on one
end and a large spike on the other. It works like a charm for general
cultivation with the prongs for larger areas between the plants, but also flips around for very
delicate work around the base of a plant with the nail end. You have to be a little careful
with a nail
sticking out of one end as it can be dangerous not only to the plants but to you
and anyone within spear length. When you construct this
tool, you actually drill a hole in the opposite end of the fork and with the end being oak in most cases, you need a pilot
hole and use a long screw. So actually the head of the screw will be on
the end. You don't have to grind it to a point. By doing this you
reduce the chances of hurting yourself. Hoes and deep cultivation are the serial killers of
gardening. When plants become established and you use mulch, just going
out in the bed and gently loosening the mulch a little is all you need with the
spike end. It will keep the mulch on the top of the ground instead of
burying it. Not a bad idea using the spike end in your larger potted plants. They like a little oxygen too. You will be intrigued with this
tool. We show you
how to create it and we show you how to use it. The link is
http://www.blueeyedcurse.com/aloeplanttool.htm
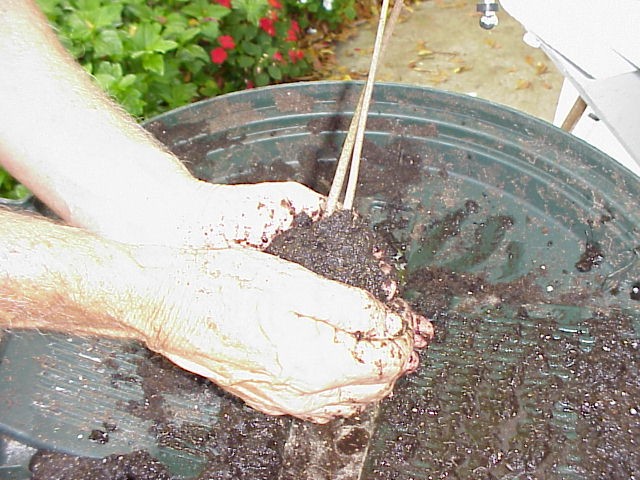
We can go a step further with the cultivation using the spike end above and your hands. The famine stricken Chinese down through the ages worshipped their soil and went to extremes to maximize the production of food to feed their starving millions. We have read where it was mandated to use all human waste and cultivated it back into the soil. I don't know how stringent they are with this practice at this time now that they hold the majority of our debt. My guess is there are few starving Chinese any more.
 Now
hand cultivation of plants was and most likely is common even today in China and
it is common in our back yard. As mentioned before in this feature
cultivation with hoes and hooks can be lethal to a plant. In most cases the
only thing that is accomplished is severe root pruning and you don't want to do
that. Cultivation of plants is a tremendous benefit. It cleans up
weeds that compete with the plant for moisture and food, but more
importantly it loosens up the
soil and allows what they refer to as capillary action. Capillary action
by breaking the crust of the soil is critical for water and nutrients being drawn
up and back into the root zone and acts similar to water being drawn up in a straw through osmosis and capillary action is just that.
Now
hand cultivation of plants was and most likely is common even today in China and
it is common in our back yard. As mentioned before in this feature
cultivation with hoes and hooks can be lethal to a plant. In most cases the
only thing that is accomplished is severe root pruning and you don't want to do
that. Cultivation of plants is a tremendous benefit. It cleans up
weeds that compete with the plant for moisture and food, but more
importantly it loosens up the
soil and allows what they refer to as capillary action. Capillary action
by breaking the crust of the soil is critical for water and nutrients being drawn
up and back into the root zone and acts similar to water being drawn up in a straw through osmosis and capillary action is just that.
 Plants
and trees couldn't thrive without capillary action. Plants put down roots into
the soil which are capable of carrying water from the soil up into the plant.
Water, which contains dissolved nutrients, gets inside the roots and starts
climbing up the plant tissue. As water molecule #1 starts climbing, it pulls
along water molecule #2, which, of course, is dragging water molecule #3, and so
on.
Plants
and trees couldn't thrive without capillary action. Plants put down roots into
the soil which are capable of carrying water from the soil up into the plant.
Water, which contains dissolved nutrients, gets inside the roots and starts
climbing up the plant tissue. As water molecule #1 starts climbing, it pulls
along water molecule #2, which, of course, is dragging water molecule #3, and so
on.
When cultivating the first thing I do is loosen up the soil very carefully next to the trunk of the plant with the spike. A little deeper away from the plant with the fork end. This makes it easier for me when I use my hands in the same area as the soil is nicely loosened up with the spike to get started. Now with my hand or hands I gently work up the soil right up to the trunk of each plant and of course pulling any weeds as I do it.
There is no way that you can safely and thoroughly cultivate a plant better than with this method. If you tried to do this with any tool including the spike exclusively, you are going to damage the plant.
 Now
I know you gals are probably saying is this guy is nuts, does he actually think I
am going to dig my nails into the soil, after looking so beautiful coming home
from the nail salon? There are light garden gloves that can solve that
problem. You might not have the same amount of sensitivity as you have
with your bare hands though, but you can do a good job with gloves.
Now
I know you gals are probably saying is this guy is nuts, does he actually think I
am going to dig my nails into the soil, after looking so beautiful coming home
from the nail salon? There are light garden gloves that can solve that
problem. You might not have the same amount of sensitivity as you have
with your bare hands though, but you can do a good job with gloves.
 There
is another bonus to digging around the soils with your hands and that is being
exposed to soil bacteria. Oh yes there is a lot of bacteria in soil.
In fact if you study agronomy you will find that it is what makes things work in
the soil. Exposing yourself to soil bacteria helps you build up immunities
and I have never heard of anyone being adversely effected by digging in the soil,
other than their back being effected, because they don't do enough of it.
I read recently during the spine flu scare that people were congregating and
actually trying to expose themselves to a mild dose of the flu to build up
immunity. Most Doctors frown on this approach and I do too.
There
is another bonus to digging around the soils with your hands and that is being
exposed to soil bacteria. Oh yes there is a lot of bacteria in soil.
In fact if you study agronomy you will find that it is what makes things work in
the soil. Exposing yourself to soil bacteria helps you build up immunities
and I have never heard of anyone being adversely effected by digging in the soil,
other than their back being effected, because they don't do enough of it.
I read recently during the spine flu scare that people were congregating and
actually trying to expose themselves to a mild dose of the flu to build up
immunity. Most Doctors frown on this approach and I do too.
A little point of interest regarding bacteria in soil. Yes bacteria is needed, but there is a problem when you plant tender cuttings or even potted plants where the leaves touch the soil. Bacteria can kill a young plant. The first thing we do when we finish planting a section of the garden is have some mulch ready. Most people relate mulch with weed control and moisture retention. This is of course correct, but there is a little garden secret that most do not know and that is that a little mulch placed directly under the leaves of a new plant will help to avoid bacteria transfer especially by preventing soil to splash on the leaves during watering and heavy rains.
One caution here and that is mulch has a tendency to pack and plants do need air especially when they get started. Do not let the fact that you have mulched prevent you from periodically working the ground and mulch up around the plant. You may disturb a little mulch and uncover some bare ground. Just get a little more mulch and cover the bare spots. Incidentally that garbage can cover shown above. When you are mulching, shake loose the mulch from the bag into the garbage can cover and see how easy and efficient it is to use this method.
Planting techniques
 The
photo on the left is a technique you may want to try. This is one of our favorite
techniques. This can be used for a single cutting, a group of cuttings, bulbs or
even larger plants. Here by playing the hose on the potting soil you can
mold it almost like clay. Firming potting soil against a rooting surface with a
material that is appropriate (Miracle Gro potting soil is our choice) can be
very rewarding. We keep a large garbage can always full of potting soil. We use
this method a great deal. The potting soil will aerate when it dries between
watering and of course the potting soil will retain moisture. Another feature of
Miracle Gro potting soil is it has plant food added to it and this helps.
The
photo on the left is a technique you may want to try. This is one of our favorite
techniques. This can be used for a single cutting, a group of cuttings, bulbs or
even larger plants. Here by playing the hose on the potting soil you can
mold it almost like clay. Firming potting soil against a rooting surface with a
material that is appropriate (Miracle Gro potting soil is our choice) can be
very rewarding. We keep a large garbage can always full of potting soil. We use
this method a great deal. The potting soil will aerate when it dries between
watering and of course the potting soil will retain moisture. Another feature of
Miracle Gro potting soil is it has plant food added to it and this helps.
 One
of my favorite tools in the garden is a post hole digger. In fact when
I am digging a hole in the middle of a cluttered garden, I bring out my
trusty garbage can cover. Now when I start to dig the hole I just
simply place the dirt from the posthole digger into the garbage can cover.
This is better than slobbering it all over the surrounding plants,
wouldn't you say? Then after I plant, I take the garbage can
cover with the soil in it and sift it beautifully around the plant.
Rachel Ray calls that NEATO! at least when she is sifting flour.
Rachel comes from our home town in N.Y.
One
of my favorite tools in the garden is a post hole digger. In fact when
I am digging a hole in the middle of a cluttered garden, I bring out my
trusty garbage can cover. Now when I start to dig the hole I just
simply place the dirt from the posthole digger into the garbage can cover.
This is better than slobbering it all over the surrounding plants,
wouldn't you say? Then after I plant, I take the garbage can
cover with the soil in it and sift it beautifully around the plant.
Rachel Ray calls that NEATO! at least when she is sifting flour.
Rachel comes from our home town in N.Y.
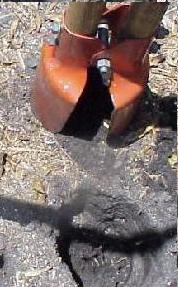
Miracle Gro Direct Bar Hole and Slurry Method
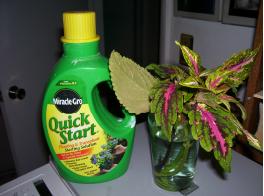
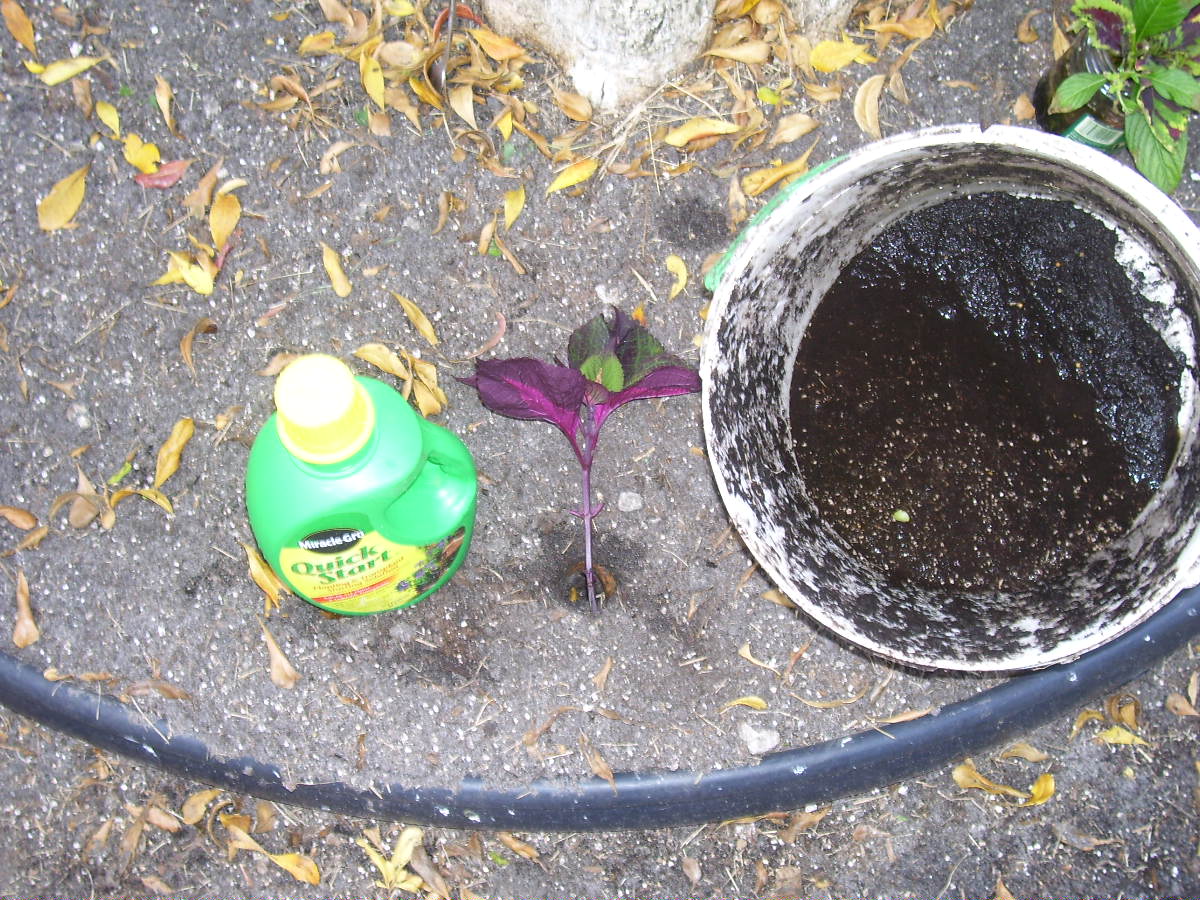 My
favorite method in planting cuttings is where I take a bucket of very wet
Miracle Gro potting soil as pictured on the left with cuttings into the garden.
Also on the left is a jug of Miracle Gro starter solution. I take a couple
of cap full's and put it in the bucket with the potting soil slurry and mix it
with my hand.
My
favorite method in planting cuttings is where I take a bucket of very wet
Miracle Gro potting soil as pictured on the left with cuttings into the garden.
Also on the left is a jug of Miracle Gro starter solution. I take a couple
of cap full's and put it in the bucket with the potting soil slurry and mix it
with my hand.
As pictured on the left between the bucket and the starting solution is a cutting waiting to be planted where the hole was created with our bar.
Now this process accomplishes many things..
First you are applying the perfect environment for any plant, Miracle Gro potting soil. It is very wet, has the right ingredients, perlite, peat moss etc. for root development and it has nutrients besides to get the plant started and channeled through those little stubs on the cuttings. These nutrients are in addition to the starting solution mixed in the slurry.
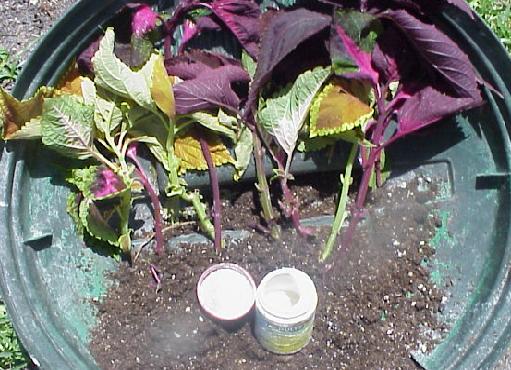 I
mentioned stubs above. (Look close at the
garbage can cover with the cuttings and you will see the little stubs on the
bottom end). These
stubs serve as tributaries for water and nutrients, until and most likely after
roots are formed. If you did not leave these short stubs and strip the
lateral branches off at the trunk you would destroy the link needed for
water and nutrient transfer. It has a lot to do with cambium layers that I won't get into at
this time. Trust me, don't strip, leave stubs.
I
mentioned stubs above. (Look close at the
garbage can cover with the cuttings and you will see the little stubs on the
bottom end). These
stubs serve as tributaries for water and nutrients, until and most likely after
roots are formed. If you did not leave these short stubs and strip the
lateral branches off at the trunk you would destroy the link needed for
water and nutrient transfer. It has a lot to do with cambium layers that I won't get into at
this time. Trust me, don't strip, leave stubs.
 The
photo on the left is where the pointed bar is used (You will see the bar in
our tools illustration above in this feature and lower right) and for
illustration purposes one cutting is placed in
the hole on the left photo.
The
photo on the left is where the pointed bar is used (You will see the bar in
our tools illustration above in this feature and lower right) and for
illustration purposes one cutting is placed in
the hole on the left photo.
This happens to be our favorite
means to plant cuttings. It is quick, cheap and effective. If
you take the bar and wiggle it toward the top, you create a contoured hole,
larger on the top, tapered down that allows the hole to be easily filled with
the
 very wet slurry of Miracle Gro potting soil. Just hold the cutting at the
proper height and with your hand essentially "pour" the wet slurry in the hole
and poke your finger down in the hole to insure the slurry completely fills the
cavity and removes any airspace, that will prevent new roots from forming and
adhering to the soil around it.
very wet slurry of Miracle Gro potting soil. Just hold the cutting at the
proper height and with your hand essentially "pour" the wet slurry in the hole
and poke your finger down in the hole to insure the slurry completely fills the
cavity and removes any airspace, that will prevent new roots from forming and
adhering to the soil around it.
The wet slurry eliminates one of the biggest nemesis to young cuttings and that is air. Plants need air, but not next to the roots. Too much air reduces the new roots from adhering. This is why when planting a tree that you should put the root ball in the hole, shovel a little soil in at a time into the hole and water it good so there is a seal formed around the roots without air. Same thing applies to a cutting.
 In
the photo on the right you will see a new planting of cuttings. In fact
the photo was taken the day after I planted them using the bar and slurry
method. You will note how perky they are. This temporary planting is
under a palm tree and gets a little sun in the morning. Now if you
took these same cuttings and planted them out in your permanent garden beds in
the blinding sun, they would wilt for sure and you would have to baby them with
water and even shade them with anything you can get your hands on to keep them
alive. I plant cuttings direct, but confine them to the shaded
or partially shaded areas. If they are going to be planted in the sun, I
start them in the shaded stockpile.
In
the photo on the right you will see a new planting of cuttings. In fact
the photo was taken the day after I planted them using the bar and slurry
method. You will note how perky they are. This temporary planting is
under a palm tree and gets a little sun in the morning. Now if you
took these same cuttings and planted them out in your permanent garden beds in
the blinding sun, they would wilt for sure and you would have to baby them with
water and even shade them with anything you can get your hands on to keep them
alive. I plant cuttings direct, but confine them to the shaded
or partially shaded areas. If they are going to be planted in the sun, I
start them in the shaded stockpile.
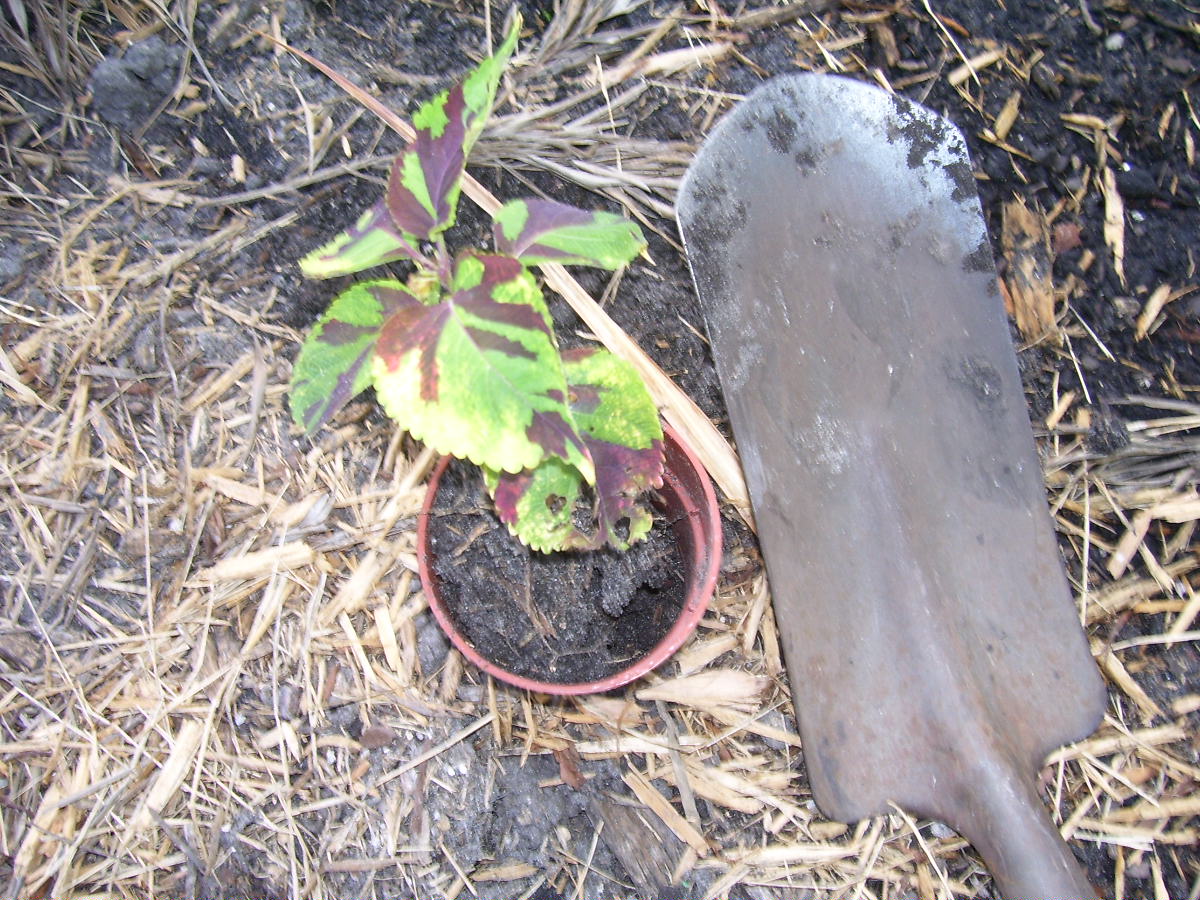 We
use the method on the left when the cuttings
have perked up in our stockpile and have started to root. We then take a shovel and one at a time, dig a
hole where we want to plant them in the garden. We then take the shovel and dig under the cutting and remove a nice clump of
soil with the cutting. You will then proceed to transport the treasure to its
place in the garden.
We
use the method on the left when the cuttings
have perked up in our stockpile and have started to root. We then take a shovel and one at a time, dig a
hole where we want to plant them in the garden. We then take the shovel and dig under the cutting and remove a nice clump of
soil with the cutting. You will then proceed to transport the treasure to its
place in the garden.
The method in the image above shows where we have taken a cutting that was planted with the bar/slurry method in the shaded stockpile and temporarily place the little ball of dirt and cutting into a 4 inch pot, so we would not disturb the roots that had already adhered to the soil. If you really want to extend yourself, dig a bigger clump and put the clump and cutting in a 6 inch pot. We use this method when transporting multiple cuttings to areas away from the source. I am talking a 50 feet or more. If the cutting is going to be planted fairly close to the stockpile, again I just dig up a clump and move it to the garden area with it on top of the shovel and carefully sliding it into the new hole without disturbing the roots. When you arrive at the hole, again so you don't disturb the roots, ( worth repeating) adjust the depth of your hole with the post hole digger. Just leave the clump on the shovel and again gently slide it down into the new hole.
Start cuttings in water
 (Some
folks have luck starting cuttings in water and then transplanting them) We
like the potting and bar hole concept, although starting them in water, then potting them
makes sense too. If you bring kids into this effort, they will get a
big kick out of watching for the roots to form in the glass. In the glass to the left I put about a 1/2 teaspoon of the
starting solution in the glass. You may have to experiment with the
concentration. Go light and increase a little when the roots start to form. You
could also take a little Miracle Gro potting soil and put some in
the vessel you are using to develop the roots. Remember Miracle
Gro has a very good starting fertilizer in it, so adding a little soil make
sense. Not much now, keep it liquefied. The potting soil will
gravitate to the bottom of the vessel. You might want to gently shake
it when you add a little water every so often.
After you obtain a fair amount of roots, you can plant them into pots or directly into
the garden.
(Some
folks have luck starting cuttings in water and then transplanting them) We
like the potting and bar hole concept, although starting them in water, then potting them
makes sense too. If you bring kids into this effort, they will get a
big kick out of watching for the roots to form in the glass. In the glass to the left I put about a 1/2 teaspoon of the
starting solution in the glass. You may have to experiment with the
concentration. Go light and increase a little when the roots start to form. You
could also take a little Miracle Gro potting soil and put some in
the vessel you are using to develop the roots. Remember Miracle
Gro has a very good starting fertilizer in it, so adding a little soil make
sense. Not much now, keep it liquefied. The potting soil will
gravitate to the bottom of the vessel. You might want to gently shake
it when you add a little water every so often.
After you obtain a fair amount of roots, you can plant them into pots or directly into
the garden.
Root Bound Long Term
We have all seen root bound plants where
the roots spiral around the inside of the pot. In some cases you can
dig into those roots and loosen them, rather than leave them in this bound
state. Now we have a method and the picture to the left will clearly
illustrate the principle. By cutting a hole in the bottom of the pot, I use
a metal snipper, you allow roots not only to grow out of the bottom but you
create a root system that is inclined to go down and this is good, as roots in root bound pots have an inclination to go laterally and be subjected
to dry conditions, being closer to the top of the ground. By having
the potting damp, there is little chance that it will drop out of the
bottom of the pot. It is important that you loosen the ground underneath
these areas and even adding some good potting soil will help.
There is also a very special phenomena that takes place when you use the hole in the pot method. I am not going to get into the technical aspects of gravitational issues that control plant health. There are two major periods of the day where the lifeblood of the plants are either traveling up or down the network of the tree.
There is a magic process that takes place when the plant and the roots in particular are physically connected to the earth. Now when we pot cuttings we use pots with the holes in them or at least a large portion of the bottom of the pot removed as all pots have small drainage holes in them.
We make sure that the cuttings are long enough so that when we use a rather large spike like a landscape nail we drive the nail right down to the bottom of the pot through the Miracle Gro potting soil and place the bottom of the cutting down to the bottom of the pot so that it enjoys the connection to Mother earth with all of its blessing.
In about a week, just dump a pot out carefully and you will see feeder roots coming out on the very bottom of the stem.
Incidentally after we recover caladium bulbs in Florida that we have gathered in the fall
and stored away, we bring them out in the middle of January, plant
them in these opened bottom pots and place them in a protected area, and
being prepared to cover them with a some coastal hay when they pop up their
heads in a cool spell. In about 6 weeks these puppies are really
growing and boy are the roots shooting through the bottoms of the pots with
the holes in
 them. Around the first of March we plant them out in the
gardens as the first of March here in Florida cold conditions are past.
This gives us a head start in enjoying the beauty of Caladiums as the
nursery's that sell them are not geared to ship them much earlier than the
first of March and that is a bummer for me as this loses over a month of
blooming. We do buy a new
batch of first generation bulbs every year, plant them in the spring, mark
them with stakes and recover them in the fall as described in the feature
above. You can see the green stake in the middle of the photo on the
left. You can buy this stake material at Home Depot in the lumber
department. They are about an 1/1/2 inches wide and about 3/8ths of an
inch thick. They come in 6 or 8 foot lengths so you just have to knock
them off into 12 inch lengths. If you want to spray them green as I do
fine, if not the pressure treated brown color is o.k. too.
them. Around the first of March we plant them out in the
gardens as the first of March here in Florida cold conditions are past.
This gives us a head start in enjoying the beauty of Caladiums as the
nursery's that sell them are not geared to ship them much earlier than the
first of March and that is a bummer for me as this loses over a month of
blooming. We do buy a new
batch of first generation bulbs every year, plant them in the spring, mark
them with stakes and recover them in the fall as described in the feature
above. You can see the green stake in the middle of the photo on the
left. You can buy this stake material at Home Depot in the lumber
department. They are about an 1/1/2 inches wide and about 3/8ths of an
inch thick. They come in 6 or 8 foot lengths so you just have to knock
them off into 12 inch lengths. If you want to spray them green as I do
fine, if not the pressure treated brown color is o.k. too.
 A
few words on fertilization. Growing flowers is like a guy walking a trapeze. It is a question of balance. General fertilizing on a regular basis is
smart and not over doing it is important. You can burn the roots of your
plants with over fertilization and in turn you can starve a plant,
especially if you have to water a lot. The more rain and watering, if you
have sandy soil the
quicker your plants will be without food.
A
few words on fertilization. Growing flowers is like a guy walking a trapeze. It is a question of balance. General fertilizing on a regular basis is
smart and not over doing it is important. You can burn the roots of your
plants with over fertilization and in turn you can starve a plant,
especially if you have to water a lot. The more rain and watering, if you
have sandy soil the
quicker your plants will be without food.
The question is what kind of food?
We use three kinds of food in our gardens and being that we do it more often
and not heavily it gives us the ability to observe the plants and try to
determine what they need periodically.
The three kinds are....
General 10-10-10
and I have luck with the Vigoro at Home Depot and I think Lowe's has it too,
although any 10-10-10 will do. This ratio encourages plant and
leaf growth. When you start plants it is important that you get the plant
started and healthy and for a period of time not look for a huge amount of
blooms as blooms suck a plant and blooms long term need a healthy plant to
support them. After the plants get off to a nice start it makes
a difference whether the plant is a blooming plant or a leaf plant as
this will dictate what type of fertilizer you use.
Let me explain something regarding Mother Nature. You can fool her once in a while. I did it for 40 years off and on. Now if Mother nature detects that the plant is very lush and healthy indicated by how large and deeply colored the leaves are, she will determine that there is no need for the plant to fruit. A typical example of this is the guy that goes out and fertilizes the devil out of his tomato plants and winds up with the biggest dam plants you can imagine and little to no fruit. Mother nature says no buds needed and hence no fruit.
Now on the other hand if you can find a way to keep your plants "lean" sort of a little weak, Mother natures say "Hey we have to propagate, we have to develop fruit to perpetuate the species." After fruit develops as in tomatoes plants that is the time to start a modest feed program
 We
did this for years with our strawberry plantation. We actually
neglected to feed the plants so that they would go into the spring pre-bloom
in a semi weakened condition. (In fact during the tubercular
epidemic, the statistics showed increased pregnancies in tubercular women,
that supports Mother natures instinct to perpetuate the species)
when it appears threatened.
We
did this for years with our strawberry plantation. We actually
neglected to feed the plants so that they would go into the spring pre-bloom
in a semi weakened condition. (In fact during the tubercular
epidemic, the statistics showed increased pregnancies in tubercular women,
that supports Mother natures instinct to perpetuate the species)
when it appears threatened.
This lean method worked like a charm and Mother nature threw out a huge amount of strawberry blooms, because of the jeopardy she thought she was in. Now the only problem with this practice was after the lean plant created a huge amount of fruit, the plant was not able to support the load, hence we had to find a way to feed the plants and fruit on no more than a weekly basis. You have heard me refer to Miracle Gro through this feature. We purchased it in volume originally from the Sterns Nursery in Western New York that eventually sold it to Miracle Gro 20-20-20. We bought it in 50 lbs bags and applied it.
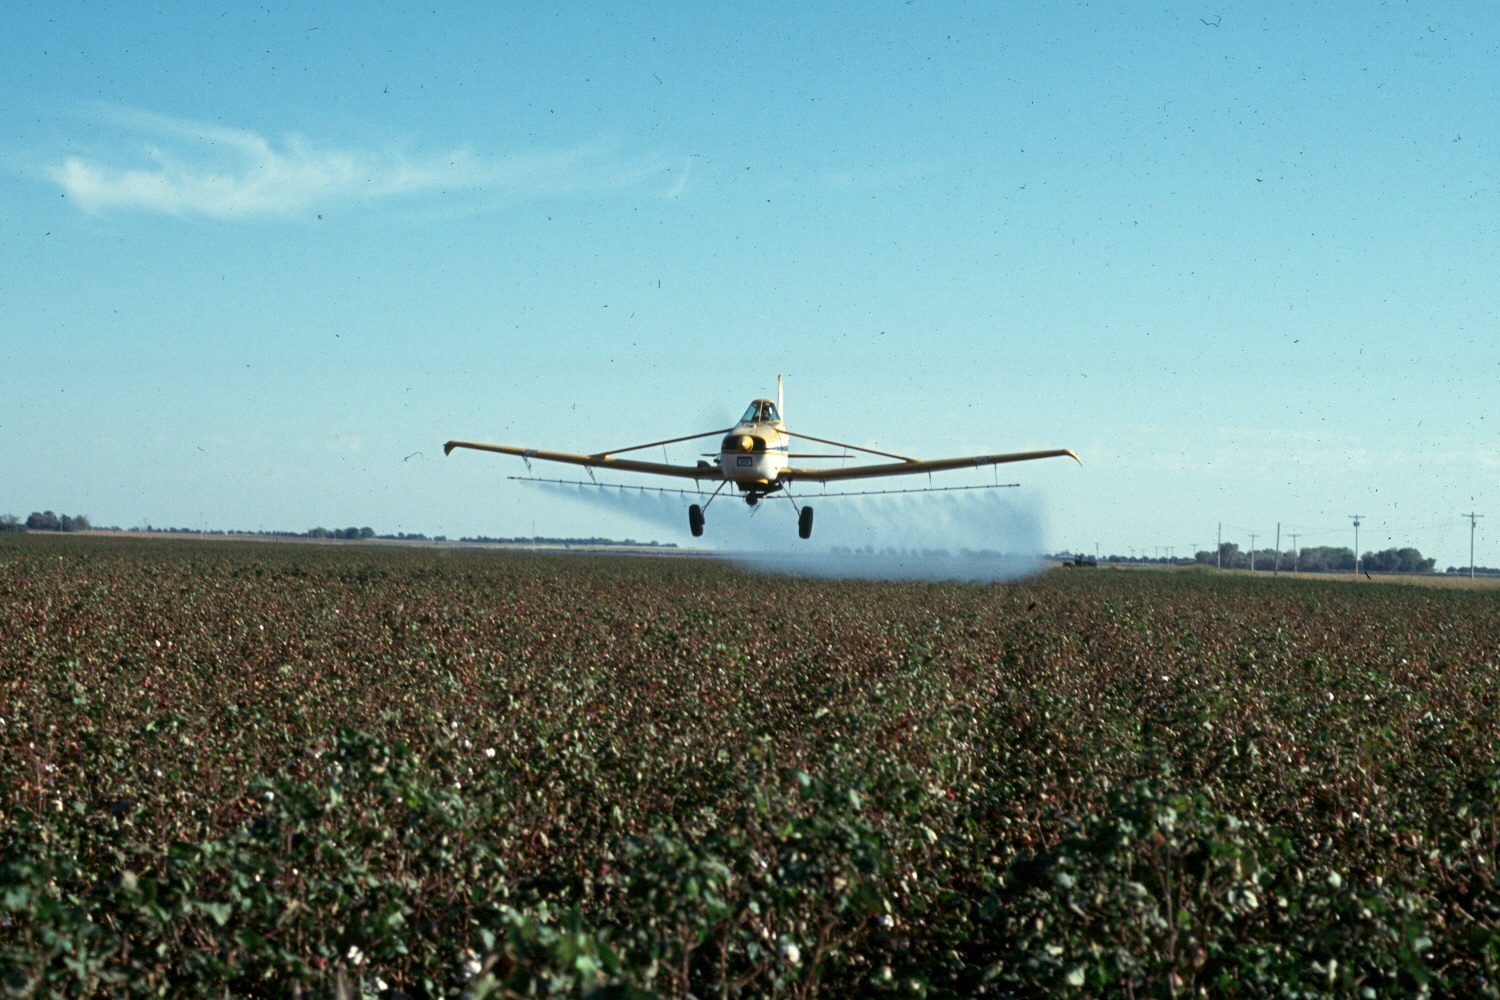
Of course once Strawberries start to fruit and drape into the rows you cannot drive into the field with standard spray equipment. The only solution was an airplane and we used one on all of our crops, for feeding, insect control and disease. We did inject feed into our irrigation system as well. Even though Miracle Gro is a balanced fertilizer it has other nutrients that encourage blooms and hence fruit, so generally you don't have to be concerned using it on your blooming varieties, like tomato plants and flowering annual. Just go easy.
Remember 10-10-10 is what they refer to as a "Hot" fertilizer. It can burn plants (lawns too) if it isn't washed in and cultivated in a day or two. Inexpensive 10-10-10 should not be used on blooming plants except the start when you want to get the plants going. Just a little goes a long way. You do this by working a little into the ground after you cultivate it, and then cultivate it again.
Now
on the other hand, Coleus are a leaf plant and they like "Hot" fertilizer
like 10-10-10. Don't over do it though. Light applications after about 6 or more
heavy waterings would do the trick. Sandy soils percolate nutrients
down and away from the root surfaces, so light coatings of "hot" fertilizer
is the ticket again for leafy plants and shrubs. Don't forget that
nail and fork tool regularly. I put it on the right so you wouldn't
forget it. It enhances the up tick of nutrients
through capillary action, up tick being up and through the root zone.
You fertilize your plants and this includes plants that you have already
mulched and than after the ground dries, you go out and work them with the
nail and your hands and they will jump the next day.
Miracle Gro 20-20-20
 Then
there is the Miracle Gro liquid applicator that you use with a hose. This is
a special balance with micro nutrients, but I don't depend on it
exclusively. It is a lot easier with the granular and I find it very
effective. Miracle Gro though has their act together and we incorporate it
into our feeding program.
Then
there is the Miracle Gro liquid applicator that you use with a hose. This is
a special balance with micro nutrients, but I don't depend on it
exclusively. It is a lot easier with the granular and I find it very
effective. Miracle Gro though has their act together and we incorporate it
into our feeding program.
The other alternative to Miracle Gro and a lot easier to a apply is the granular
Color Blast 10-30-10 (Home Depot, Lowe's etc.) or something close to it, has a balance and has an emphasis on phosphorous, that is the 30 in the middle. This ratio encourages flowering with a little amount of the other elements to produce green growth as well as root development. Incidentally I use this on flowering bushes like Bougainvilleas. Don't put hot fertilizer on flowering plants unless your wife likes green bouquets.
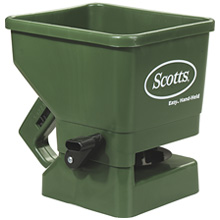 I
just broadcast fertilizer right on top of the
plants and blow it off with the leaf blower. We show a spreader on the left, but for small areas,
your hand alone for broadcasting is O.K. I have a fairly large parcel and
do my lawn feeding by hand. About a third of an acre in about 30
minutes. Most of the fertilizer bounces off the leaves and lands on the
ground. When I am done fertilizing I wash the remaining fertilizer off of
the leaves and somewhat into the ground or try to time it by watching the
weather report, just before a heavy rain.
I
just broadcast fertilizer right on top of the
plants and blow it off with the leaf blower. We show a spreader on the left, but for small areas,
your hand alone for broadcasting is O.K. I have a fairly large parcel and
do my lawn feeding by hand. About a third of an acre in about 30
minutes. Most of the fertilizer bounces off the leaves and lands on the
ground. When I am done fertilizing I wash the remaining fertilizer off of
the leaves and somewhat into the ground or try to time it by watching the
weather report, just before a heavy rain.
Now what I do is wait a few days and then do a cultivation with my spike and in some cases my hands as described above. Now when I first water the plants after fertilizing I believe the fertilizer is broken down some. So coming back in a few days and cultivating buries the fertilizer around the root zone. Now subsequent watering should not be too heavy as you don't want to percolate that feed past the root zone to fast. For a few waterings go easy.
If during the season your leaves become quite small this calls for a little
10-10-10 and not much. Conversely if the leaves become nice size and dark
green than you might want to lean toward a flowering feed, the 10-30-10.
This is followed with a light cultivation
to fill the holes and level the ground.
 This procedure should be considered
if you are dealing with a tree that is showing signs of decline. Just
make bar holes around the tree up to the drip edge (That is where the
roots of a tree end) Then take your hand and dribble the feed in the
holes and cover them with soil. It is not a bad idea to use this
method on healthy trees as well. Fertilizer left on top of the ground
goes up in a ball of smoke. Use the bar method for best results.
This procedure should be considered
if you are dealing with a tree that is showing signs of decline. Just
make bar holes around the tree up to the drip edge (That is where the
roots of a tree end) Then take your hand and dribble the feed in the
holes and cover them with soil. It is not a bad idea to use this
method on healthy trees as well. Fertilizer left on top of the ground
goes up in a ball of smoke. Use the bar method for best results.
Just thought I would throw this in for your storehouse. I know I have saved trees from demise using this method, in fact I am working on an oak tree right now that was cut back too heavy after a hurricane and is not happy at all by it. It is coming back to life.
 Smoothie Garden
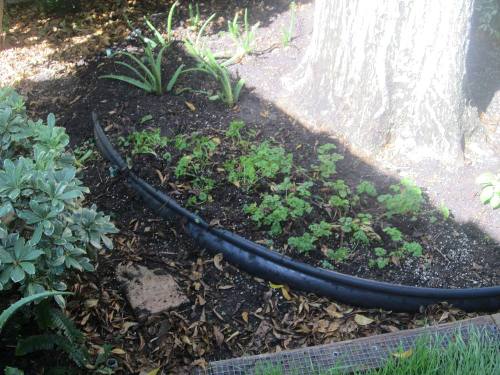
Information below relates to a special area in our gardens that we dedicate for our veggies in our daily smoothie, although we clip a few basal leaves and parsley for kitchen uses on occasion.
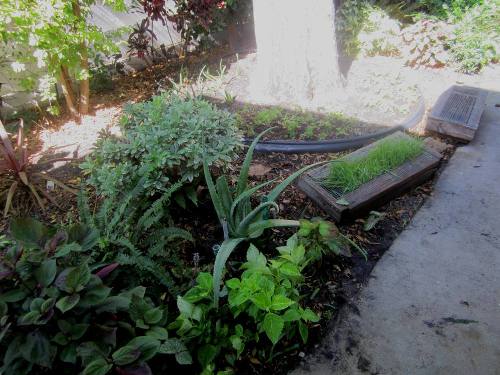
The image to the left is shot of the entire area. You can see some young Aloe Vera pups on the left in the back. There is a planting of parsley and basal in the circular area, two wheat grass trays and a mature Aloe plant that we cut pieces off of when needed as we like aloe gel in our smoothies
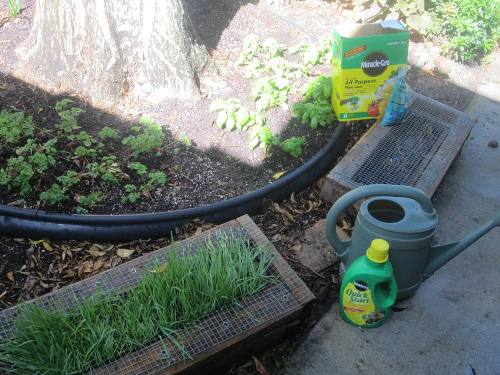 To
the left shows the parsley and basal. There are two fertilizer
products we use from the Miracle Gro company. Miracle Gro purchased
the Sterns nurse 20-20-20 product division that we applied with an
airplane on our farm in upstate New York in a foliage feed operation.
We fed our 30 acres of strawberries with the plane once a week as after
blossom the fruit would hang in the roadways between the roes.
There are two containers, one in the front is starter fertilizer. We
use 2 cups to the sprinkler can and apply it. We then rinse the leaves
with the hose that is close by. The box and bag is the powder that we
use after the plants get started a little. We use 2 scoops in the
sprinkler can and apply followed by the rinse. We apply it on the aloe
plants as well and put some on the wheat grass.
To
the left shows the parsley and basal. There are two fertilizer
products we use from the Miracle Gro company. Miracle Gro purchased
the Sterns nurse 20-20-20 product division that we applied with an
airplane on our farm in upstate New York in a foliage feed operation.
We fed our 30 acres of strawberries with the plane once a week as after
blossom the fruit would hang in the roadways between the roes.
There are two containers, one in the front is starter fertilizer. We
use 2 cups to the sprinkler can and apply it. We then rinse the leaves
with the hose that is close by. The box and bag is the powder that we
use after the plants get started a little. We use 2 scoops in the
sprinkler can and apply followed by the rinse. We apply it on the aloe
plants as well and put some on the wheat grass.
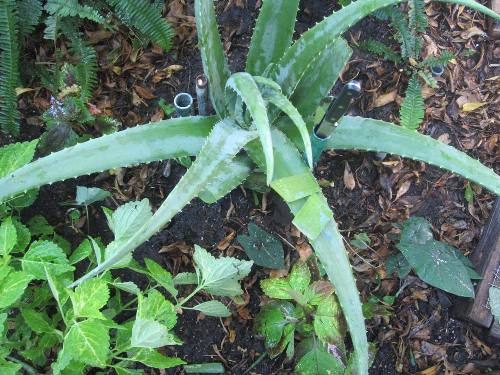
 To
the left another shot of our circular bed and a nice shot of some new Aloe
Vera Pups. We use the gel from about a 10 inch long aloe piece in our
daily smoothie. This requires a generous plantation and is part of
about 50 plants scattered throughout our back yard. Aloe is a
succulent and most winters here in Florida we have to cover them with
coastal hay to protect them.
To
the left another shot of our circular bed and a nice shot of some new Aloe
Vera Pups. We use the gel from about a 10 inch long aloe piece in our
daily smoothie. This requires a generous plantation and is part of
about 50 plants scattered throughout our back yard. Aloe is a
succulent and most winters here in Florida we have to cover them with
coastal hay to protect them.
 To
the left is a mature Aloe Plant. You will see where we have cut some of
the leaves. We use about an 8 to a 10 inch piece everyday in our
smoothie. We slice the prickers off of the sides first as they are
lethal. We then slice the leaf in half by bisecting the leaf into 2
pieces. We then filet the gel off and scrape the balance off of
the leaf with a serrated knife.
To
the left is a mature Aloe Plant. You will see where we have cut some of
the leaves. We use about an 8 to a 10 inch piece everyday in our
smoothie. We slice the prickers off of the sides first as they are
lethal. We then slice the leaf in half by bisecting the leaf into 2
pieces. We then filet the gel off and scrape the balance off of
the leaf with a serrated knife.
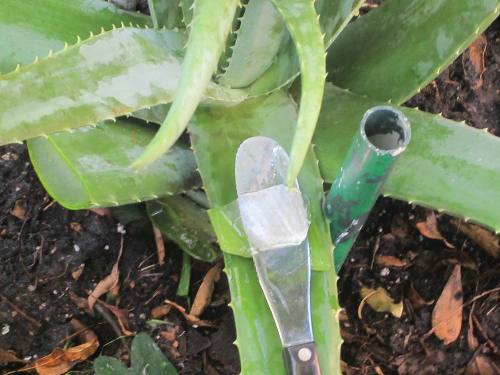 The
image on the left shows the knife filleting the gel off of the leaves both
sides after it was bisected.
The
image on the left shows the knife filleting the gel off of the leaves both
sides after it was bisected.

The wheat grass setup gives us a nice handful of grass for the smoothie. It is loaded with Chlorophyll and other nutrients. Wheat grass is easy to grow but you have keep it out the seed out of the critters hands. Don't put an open tray inside a screen window they will eat right through the screen. That screen box to your left holds a tray and as you will see grows nicely through the chicken screen. We work with 2 boxes and trays so that we can time our supply. Occasionally the growth will get ahead of us so we freeze it in a plastic bag and work it off always keeping some in reserve.
We have a nice feature on wheat grass. http://www.blueeyedcurse.com/wheatgrass.htm Check it out.
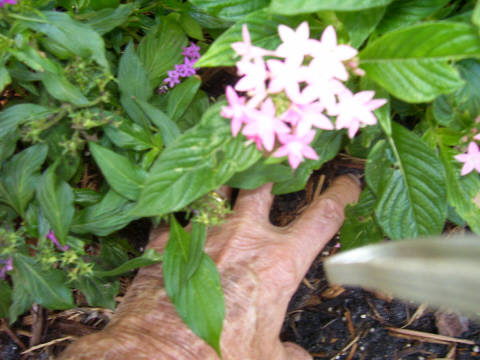
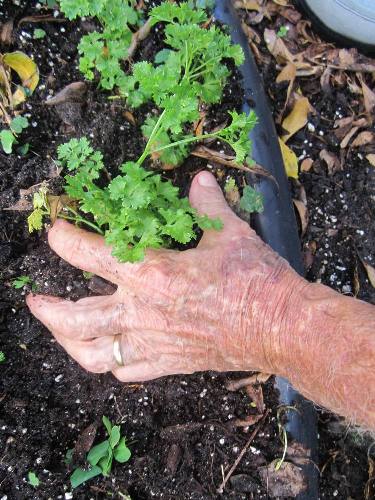 To
the left you will see what is a popular means of hand cultivation that the
Chinese have done for ages. There are plant spacings where you can
initially and carefully use a metal cultivator and not get too close to the
plant roots. They call it root pruning in the trade. We run a
cultivator in the safe areas and finish up by using our hands to gently work/loosen
the soil up right to the trunk even if I am not feeding over a billion
people like the Chinese.
To
the left you will see what is a popular means of hand cultivation that the
Chinese have done for ages. There are plant spacings where you can
initially and carefully use a metal cultivator and not get too close to the
plant roots. They call it root pruning in the trade. We run a
cultivator in the safe areas and finish up by using our hands to gently work/loosen
the soil up right to the trunk even if I am not feeding over a billion
people like the Chinese.
Lime/pH/Calcium/Magnesium
Acid/Alkaline balance.
Why does calcium make so much difference? How does it release other plant nutrients in the soil to give you, in effect, a free bonus of fertilizer? Here are some of the important facts that the soil scientists have been discovering.
Soils generally contain large amounts of aluminum and iron. In
acid soils, aluminum and iron combine chemically with soil phosphorus and tie it
up in unavailable forms. But when you lime the acid soil, this tie-up of
phosphorus is prevented from taking place, and phosphorus already tied up is
released slowly!
Calcium works the other way, too, cutting down excesses of
some minerals. Acid soils containing too much soluble manganese are as harmful
as soils containing too little. Growth is slowed; some plants may even be
stunted. As the soil gets more acid, more of these minerals become soluble. Add
calcium, and it ties up enough of them so they are no longer toxic to plants.
When you use calcium on acid soils, you save potash, too. When
plants can't get enough calcium, they take up more potassium from the soil. But
when there's plenty of calcium, plants will use more of these nutrients and
they'll not use excessive amounts of potassium. So, on a properly limed soil you
can produce good crops and not exhaust the soil potassium supply as rapidly.
Yellow alfalfa is yellow partly because it was not getting
enough nitrogen. Plants get nitrogen from three sources: From the air, from soil
organic matter, and from fertilizers. And in every case, except with some forms
of fertilizer, the nitrogen must be worked on by soil microbes before plants can
use it.
Using calcium on acid soil helps these microbes which take nitrogen from the air. The present theory of how soil acidity effects microbes is that the lime neutralizes the acids produced by the microbes while they are converting the nitrogen to available forms.
And this affects more than just nitrogen. Before your crops can use many of
the plant nutrients in the organic matter that is returned to the soil, that
organic matter must pass through a whole assembly line of soil microbes.
But before this assembly line can operate, there must be enough calcium and
magnesium for these microbes to thrive and multiply.
Too, the microbes that make streptomycin, aureomycin,
penicillin, and other antibiotics which kill or make harmless the
disease-producing microbes in the soil, must have calcium before they can really
thrive and work.
So, calcium indirectly helps control plant diseases because it peps up these
antibiotic-producing microbes.
In our orchards and fields we continued to monitor the pH of our soils. It is critical to keep the right balance in your soil. Different plants need different balances. We had professional testing and there are kits, but for a small garden and some trees you can just guess as I do.
In the case of an acid soil that is below the recommended levels, you will need lime. If you are dealing with a pH that is higher than recommended you will need an application of something to acidize the soil. This is rare. Blueberry plants up north need a very acid soil and I believe a sulfate is applied, if needed.
It is important that you obtain a good agricultural lime. There are some in Florida that feel the soil has an adequate amount of calcium and magnesium derived from the sea residues. This is a myth and especially with the mulching practices that create a very acid environment in the soil. When mulch decomposes it leaves the soil acid and in most cases more acid than the plants like. pH balance has a great deal to do with how efficient food is absorbed by the roots.
O.K. so the question is how much lime do you apply especially if you don't want to get a pH kit.? Again you can guess, I do.
We used anywhere from 2 tons to 8 tons of lime to the acre in our farming operation. The rate of application would depend on how much mulching you have done on the same ground for years or if it is new ground, how much plant material, leaves etc. have been decomposing in this area?
 If
you want to round it out conservatively without testing do 2 tons to the acre that is
4000 lbs to a 40,000
square foot area (An acre give or take) If you divide the 4000 into the
40,000 you come up with a factor of 1 lb of lime for every 10 square feet of
land.
If
you want to round it out conservatively without testing do 2 tons to the acre that is
4000 lbs to a 40,000
square foot area (An acre give or take) If you divide the 4000 into the
40,000 you come up with a factor of 1 lb of lime for every 10 square feet of
land.
We would suggest that you split it in half by "plowing down" the half when you turn the ground over and the other half on top after you work the ground up, and then work it in.
Once you measure an area and apply the right amount you will get the hang of just about any area you are applying it too with your hands.
We may add a few things to this feature in time so stay tuned to the Peacedale Farms family. You might want to bookmark this feature.
Old farmers never die they just transform into Santa Clause

We just finished a feature on Cold Nights and Tender Plants and what to do
and not to do with an impending frost or even a cold spell.
http://www.ecopeacedale.com/freeze1.htm
Don't forget to let Fido in on those cold nights

Any questions call before ( 9 P.M. EST) as we still go to bed with the
chickens and get up with them. 954-922-9181
On our farm in New York in the summer 518-732-4108
This information is intended to heighten awareness of potential health care alternatives and should not be considered as medical advice. See your qualified health-care professional for medical attention, advice, diagnosis, and treatments.